E-mail:[email protected]
Chinese
Focus on The News and Feel The Power of The Brand
1. Put the line
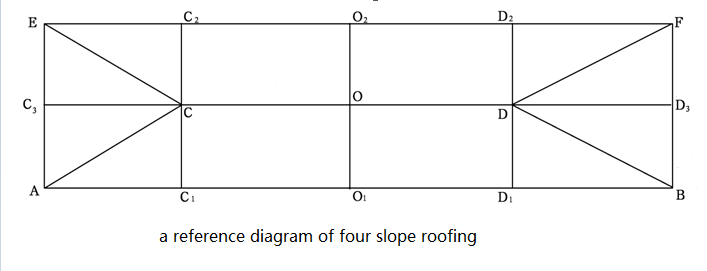
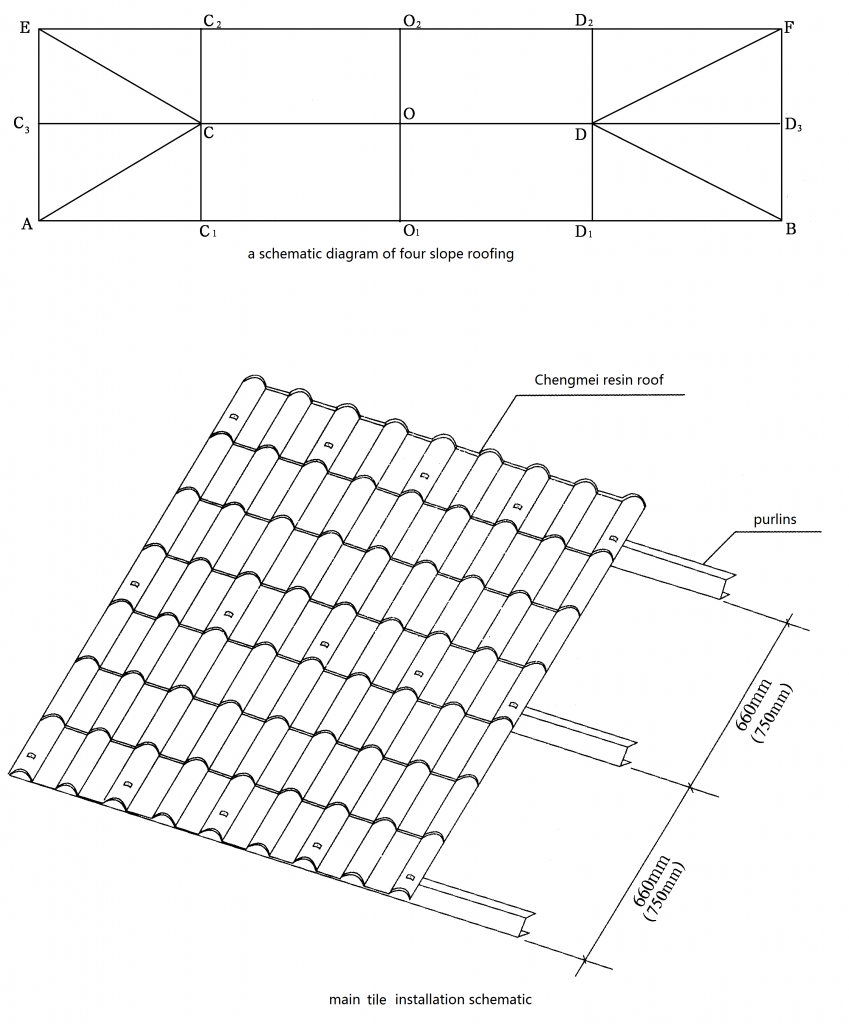
Installation should be carried out according to the actual roof line, which helps when you install the tile to achieve horizontal even vertical to ensure installation quality and achieve beautiful results (four-slope roof line diagram)
2. Installation of resin tiles
When installing two sloping roof tiles, Crest on one side and CC1(CC2) or DD1(DD2) line are in the same position, upper/ lower line of the tile and CD(AB) line are parallel each other, begin the installation from the side (CC1 or DD1 line) (diagram).
First tile installation is most important, make sure the bottom of CC1 (CC2) or DD1(DD2) lines vertical not inclined, after getting the right place, Bottom purlins and central location (wave) will be fixed (diagram).
In order to prevent the one-side connection causing tilt and unevenness, tiles are horizontally mounted to an upper and a lower rank, the second presses the first and is pressed by the third from the head to the end, then the third presses the second and is pressed by the fourth from the head to the end, and so on to lap a wave (diagram).
During installation to check tile bottom with vertical construction line at any time, the tile will be fixed after confirmation completely (diagram).
Connection of vertical installation shall be a double wave length of the tile (diagram).
Two-slope roof tiles should be installed on both sides simultaneously, to ensure that the agreement is the crest of the Ridge tile installation (diagram).
Tiles installation choose the diameter of 6.3mm, length 75mm self-tapping screws; oblique Ridge tile Ridge tile, installation according to the different fixed positions, select diameter 6.3mm, length 110-150mm self-tapping screw (diagram).
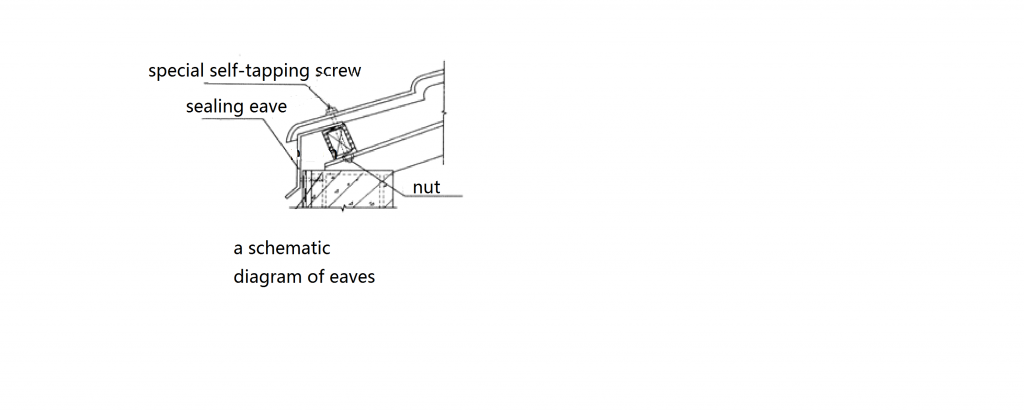
Fixed pad, put the waterproof protection mats below the Groove, and insert the self-tapping screw through the pad Center bore ( arc down ), drill perpendicular to the tile surface , fastening screw tightness when neutral , after the installation of waterproof Cap (diagram).
Steel purlins using self-tapping screws or stainless steel nails, wood purlins using self-tapping screws. On the crest to be fixed before drilling is greater than the self tapping screw diameter 2mm hole, every other wave fixed set of accessories (diagram).
Four-slope roof tiles before installation (method with two slopes). Triangle roof tiles after installation and then install both sides, up to the center line CC3, and DD3 installed for equalization of baseline on both sides, and then along the diagonal cut for easy hip tile installation (diagram).
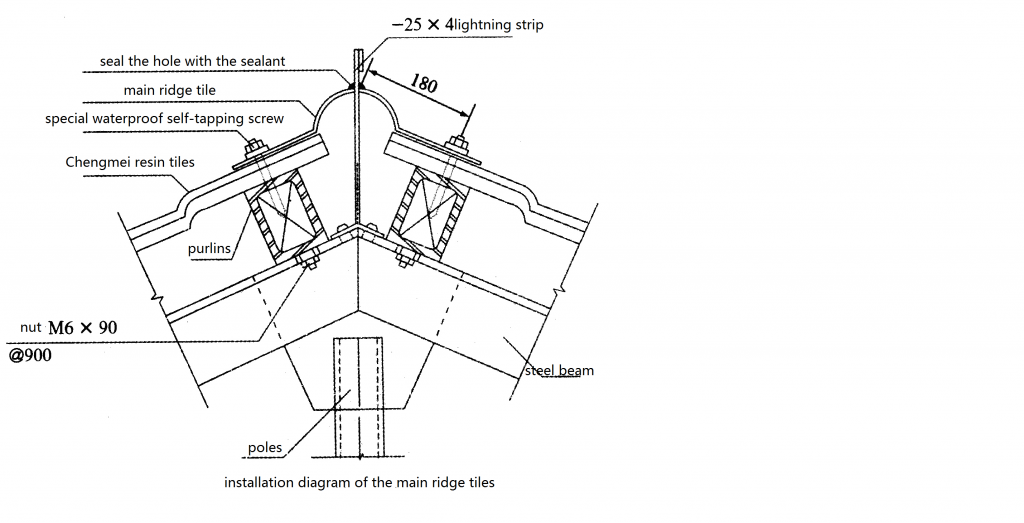
3. Install top ridge tile
Top ridge tiles are installed on the line of CD starting from one side, the fixed point of the first one avoids overlapping the fixed point of the ASA/PVC resin tiles, two top ridge tiles overlaps a wave. (Schematic drawing)
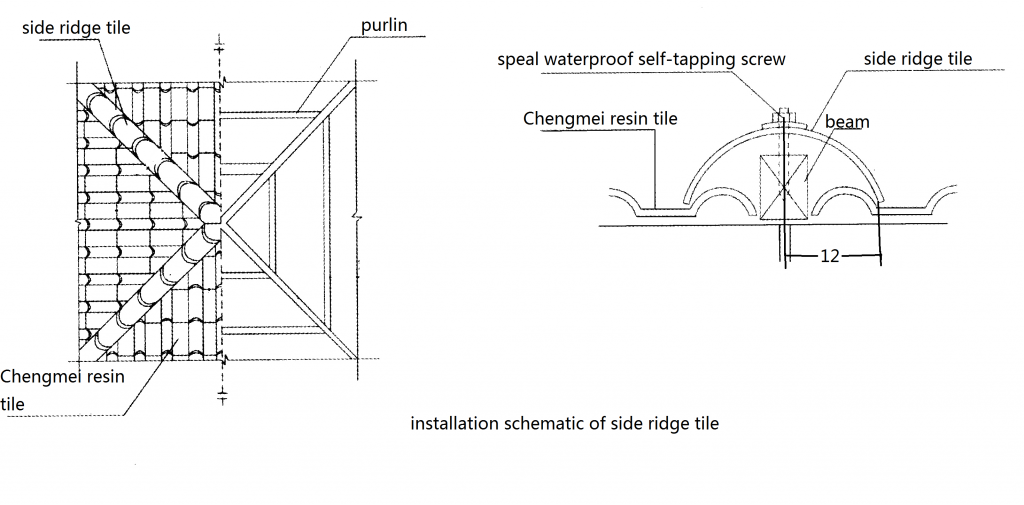
4. Install side ridge tile
Side ridge tiles are installed on a sloping roof on the hypotenuse of the triangle, to align the upper and lower tiles , two inclined roof tiles overlap 30mm, install the ridge tile end at last(diagram).
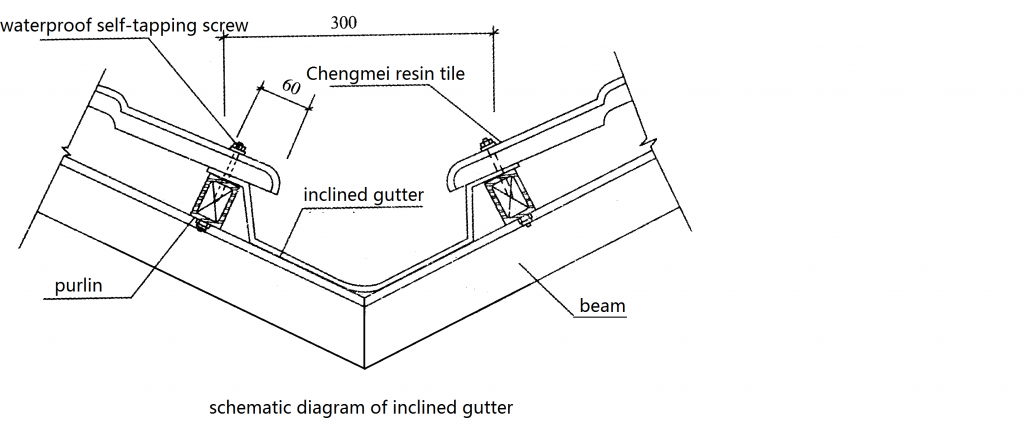
5. Install inclined gutter
Roofing inclined gutter widths can be used 1000mm, thickness 0.5mm color steel plate, or width 800mm thickness 3.0mm synthetic resin panels and other materials, customized according to site structure support, gutter-shaped tiles are fixed on the purlin before installation of tiles , exposed parts of the width is 200mm~ 300mm( procedure below).
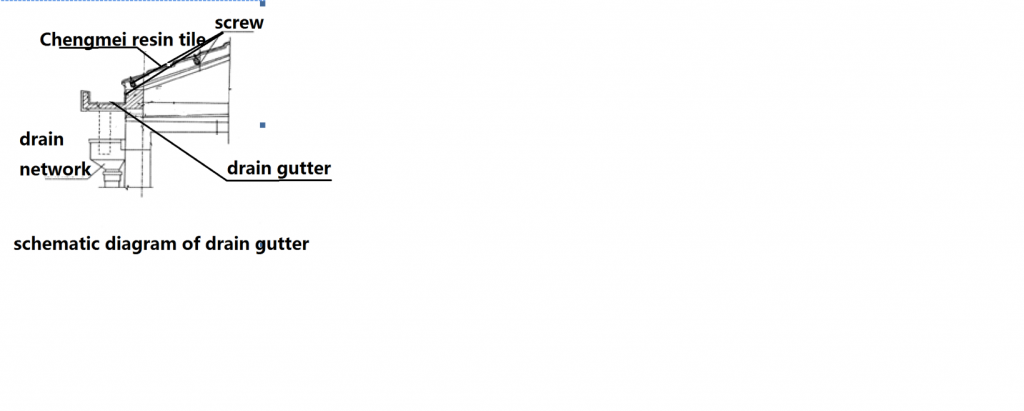
6. Install drain gutter
Drain gutter and tiles should be installed together in the end section with self-tapping screws on the purlins. If the length of purlin distance is not available, use bolts to fix eaves absolutely. At last connect to the drain network. (Schematic drawing)
Previous: ASA/PVC Roof Installation Guide